Sure this just requires a little configuration, see below how to set it up.
After running your report (for example a current balance) go to the "Scheduled" tab.

On the bottom of the screen there a few options.
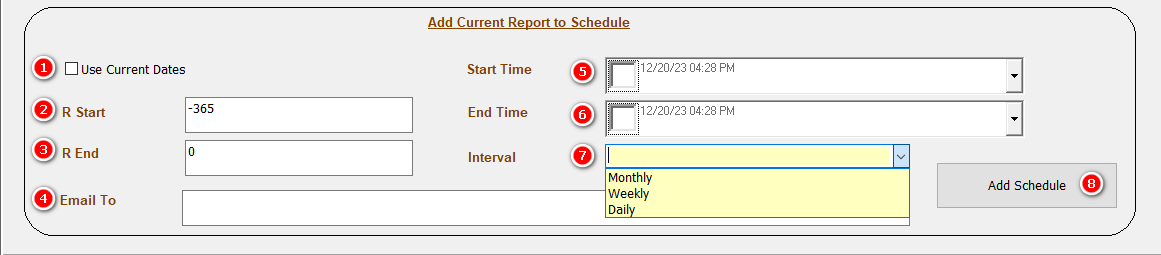
- Use Current Dates: With this check the report will always use the dates that you ran the report with. (The R Start and R End will be grayed out)
- R Start: This tells the report when the report should start. All start dates are relative to the "Interval" that you select.
You can use positive numbers and negative numbers as well as "0". 0 = The day of the report is sent.
For example: If we wanted a report to show the last 2 months, we would use "-2" with the interval set to monthly.
- R End: The same as R Start.
For example: If we wanted a report to show the next 1 month, we would use "1" with the interval set to monthly.
- Email To: This is where the email should be sent to. You can setup multiple emails by separating each email with a comma (test@sample.com, test2@sample.com)
- Start Time: What time and date you would like the report to start sending the report. So if you would like to get a report every Tuesday, make sure your start date is on a Tuesday.
- End Time: At what date should report no longer send
- Interval: How often should the report send.
Once you have your selections click "Add Schedule".
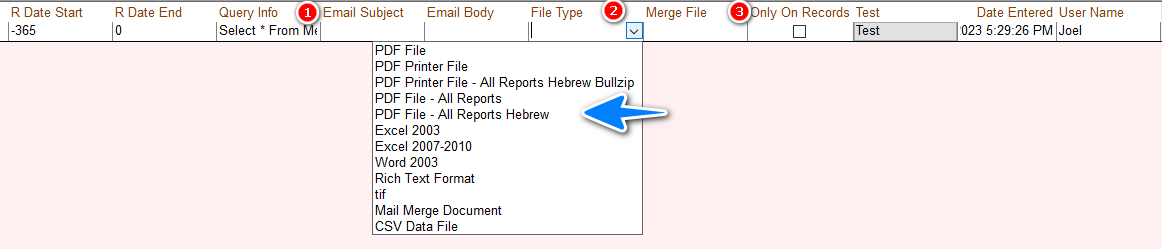
Then there are 3 things to setup:
- Email Subject: What subject should you would like should be used when the report is sent.
- File Type: For most people the correct option would be "PDF File - All Reports Hebrew".
- Only On Records: With this option check the system will only send if there is something in the report.
So if you are having a daily email of students that are absent, use this option to avoid getting a blank email when there are no students that are absent.
If you have any questions please contact support.