You can now first scan in all your checks that you have received and after that fill in the additional info for each payment.
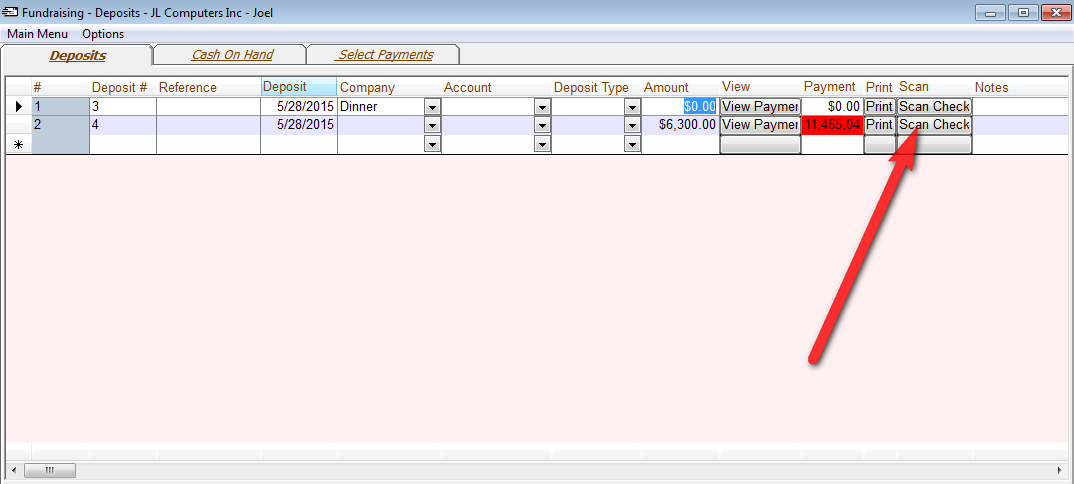
1) Go to the deposit screen. If you have already entered a few of the checks in payments select them now by select payments. If not just proceed directly to the deposit tab.
2) Enter the deposit info and amount if you know the total. If not the computer will show the total payment amount in the payment column when you are done entering all payments.
3) Click on the Scan Checks button.
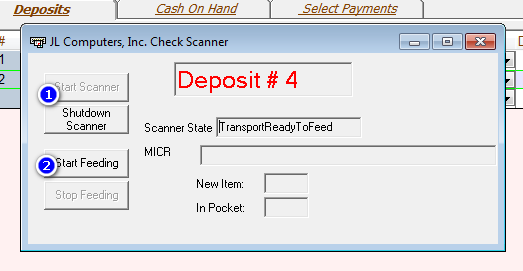
4) The Check Scanning application will now open. Click on the Start Scanner Button. This will make your check scanner ready for feeding. When done the Scanner State will display TransportReadytoFeed. The Start Feeding button will now be enable. Put in all checks in the feeder and click on start feeding. It will now read all checks. When there is nothing left to feed or the feeder became stuck a message box will popup with Feeder Error. Correct the error or add more check and press Start Feeding again. Do so until you have finished scanning all the checks. Please note the Deposit number displayed (#4). Click on the Shutdown Scanner button or the X in the right top to finish scanning.
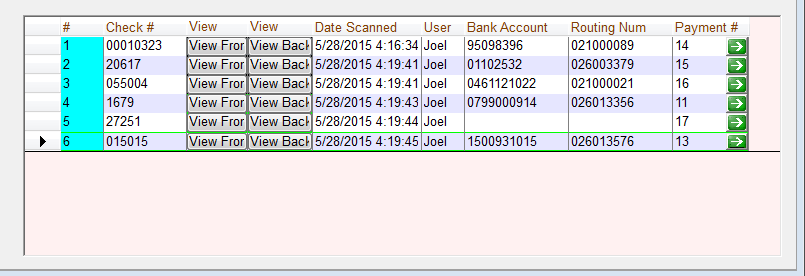
5) When clicking back on the deposit you should now see a list of scanned checks in the bottom right corner. You can click on View Front to view the check. If the payments are already entered you should now see the payment numbers in the Payment # column. You can click on the green go button to go to the payment. If you want to edit or delete a row choose the "Allow Editing Scanned Checks" from the Options menu. Continue to step 6 if you haven't entered the payments yet.
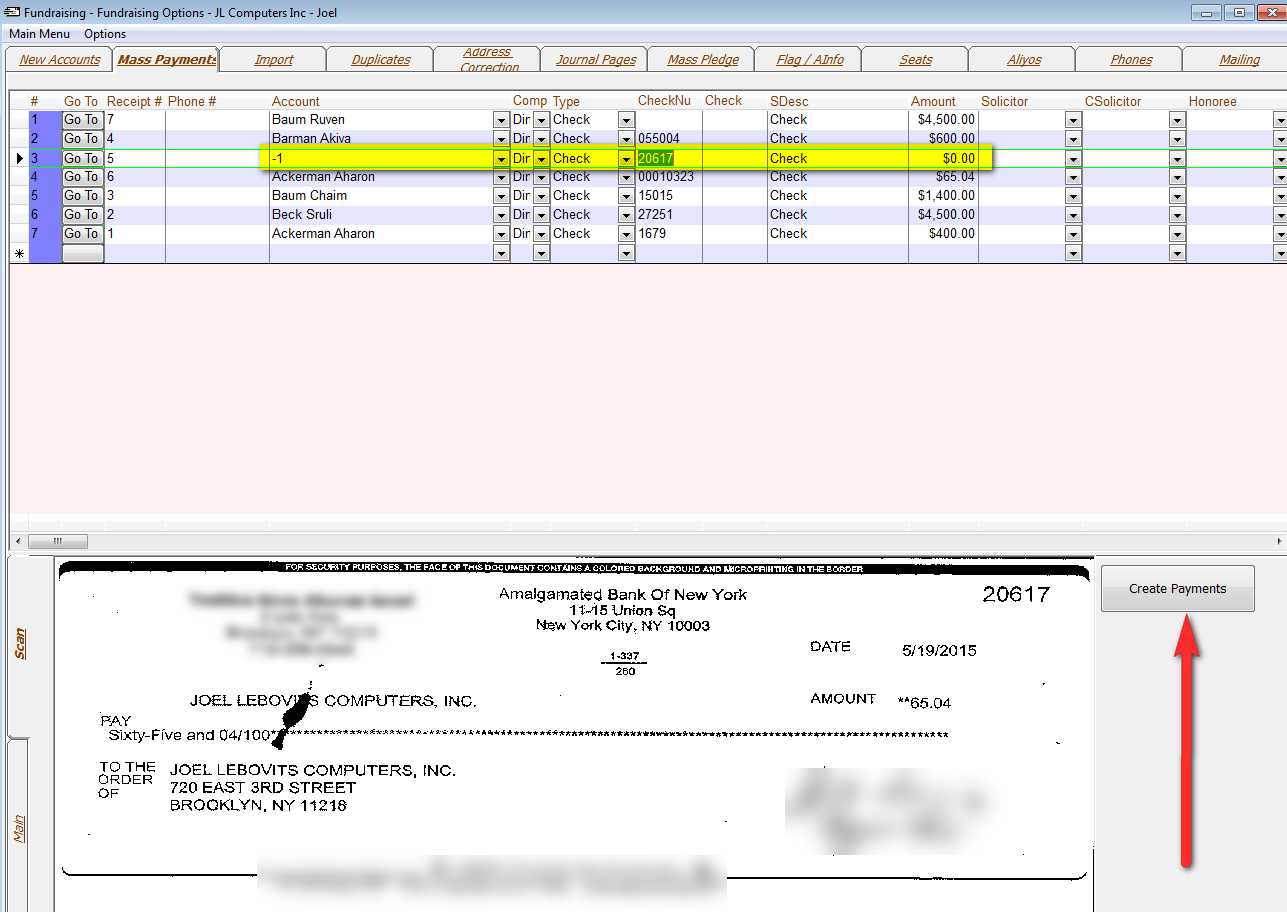
6) Go back to the Main menu and go to the Entries Screen. Go To The Mass Payments tab. Enter the default info for these checks (For example Campaign, Date, Solicitor, Etc.) You must enter a company. Also enter the Deposit Number that you saw on the previous screen. Click on the Scan Tab.

7) Now click on the Create Payment button. All payments will be displayed. It will try to auto detect the account based on the routing and bank account info. You can now choose the account and enter the amount and apply the payment to correct place. When you go on each row the check will be displayed below so you can see the amount and account info. (We currently don't use OCR to detect the amount of the check. The technology to do it is in its infancy and cost in the thousands to license for each school.) If you haven't yet entered the total amount of the deposit you can now go back to the deposit screen to enter it.