You can now create a group of people without adding a flag and use the group for any query. To create a group, use the following steps.
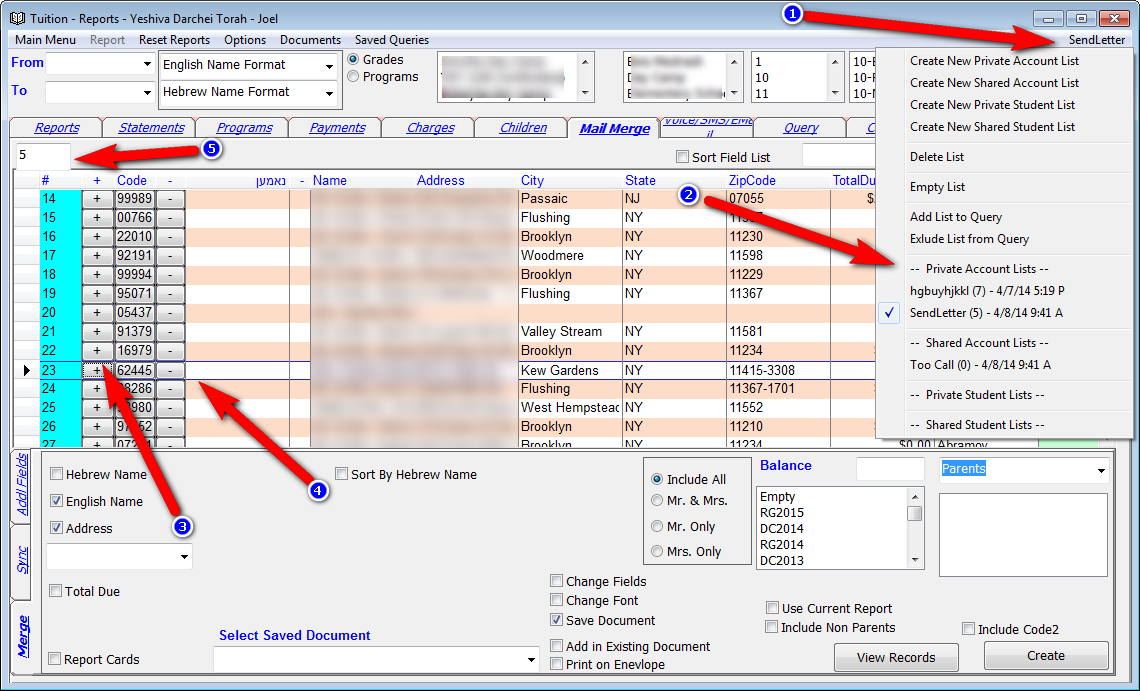
1. Go to the reports screen and click on the menu (1) on the right side. Choose from the top for options which type of list you want to create. You can create a private list that only you will be able to use or a shared list that will be visible for everyone. In the Tuition Application you can also create a list of students.
2. To choose a list that you are in middle of working on, click on the menu on choose the list from the bottom part of the menu (2). Each list will show the amount of accounts on the list and the date the list was created. (My List Name (10) - 4/2/14 3:45 A).
Once a list is chosen each show on the top of the menu (1) and there will be a check next to the name in the menu.
3. To add accounts to the list go to the Mail Merge tab and display any records that you want to choose from. Once you have a list of records just click on the + column (3) to add this record to the list. To remove someone from the list, click on the - column (4). When adding or removing people from the list the number on the tab of the tab (5) will change to display how many accounts are currently in the list. In Tuition if a student list is selected and you have children displayed in the grid, it will add the students to the list.
You can also add to the list from a report that has the option to click to go to the account.
4. To empty the list, choose the menu on top after the list has been selected and click on Empty List. To select a list you need to follow step 2 above.
5. To delete a list completely choose the menu on top after the list has been selected and click on Delete List. To select a list you need to follow step 2 above.
(ADDED 8/13/2014) To add or remove a group of people to the list you can click on the + or - symbol in the header row.
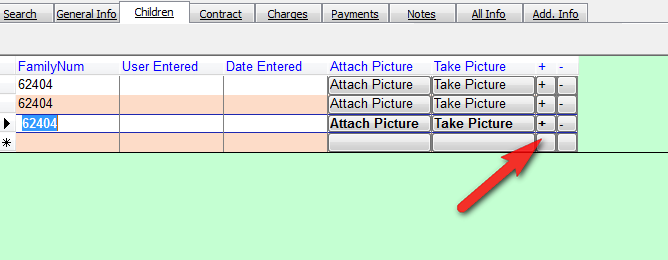
To add or remove a single account for the account screen you can use the drop down button next to the account number by the center top of the account screen. For a student list you can use the + and - Columns in the Children Tab. You must first select the list in the reports screen.

In the student Grid we added two columns + and -. You need to unhide it.